ToyPiano allows you to play melodies, chords and arpeggios.
The application features 3 play modes, 4 sounds and 9 effects.
You can even play along song from your iPod Library.
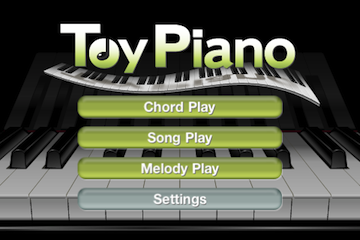

******* Chord Play *******
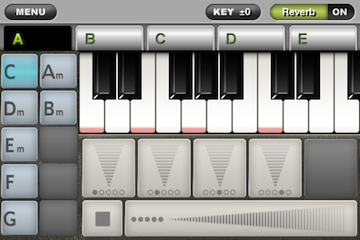
This mode allows you to play chords that you preset on the pallet.
The pallets can be preset for 10 x 5 sets.
There already are 16 major chords preinstalled, and you can customize chords by combining notes and symbols on the pallet.
– How to Play –
Tapping the keyboard plays notes.
Select a chord from a pallet on the left side of the screen.
Notes of the selected chords will be shown in red on the keyboard.
A button under the keyboard plays an arpeggio.
Pressing the upper part of the button makes the sound louder while pressing the lower part makes the sound weaker.
Sliding your finger on the screen also makes sounds.
The mute and chord buttons are located under the arpeggio button.
The chord button plays the chord’s notes all together.
Pressing the right side of the button plays the louder sound while pressing the left side plays the sound weaker.
The mute button mutes all the audio.
– Setup Chords –
To setup chords, tap the menu button on the upper left of the screen and select “Select Chord” from the list.
You can toggle the chord selection between 2 tabs shown at the bottom of the screen.
- NORMAL Tab
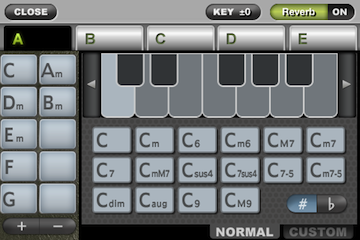
Select a chord from the 16 major chords.
Tap the keyboard to select root note for the chord.
Drag and drop the chord name shown under the root note onto the pallet (on the left side of the screen) in order to setup chords.
- CUSTOM Tab
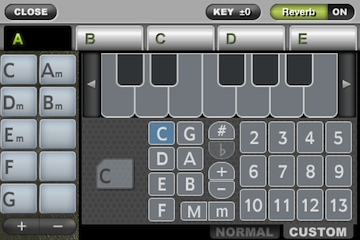
Select chord notes and symbols on the pallet to create your original chords.
Select notes that you wish to play on the keyboard. (Max. 5 notes. When choosing more than 5 notes, the notes will be deleted from the oldest selections.)
Drag and drop the selected chord on the pallet to setup the chord.
******* Song Play *******
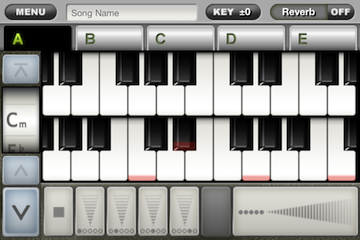
This mode allows you to preset a chord progression of a song and play the chords in order.
It is very useful when you play a song or sing.
You can setup up to 200 chord progressions on each tab from A to E.
It can be setup in various ways such like: A for intro, B for verse and bridge, C for chorus.
Includes 5 sample songs.
You can add, delete or sort songs by using the Edit button on the song list screen.
– How to Play –
Functions such as the keyboard, mute button, arpeggio button and chord button work the same as explained in the Chord Play section.
The up and down arrows on the left side of the screen can forward, rewind or jump to the top each chord progressions.
– Setup Chords –
To setup chords, tap the menu button at the top left of the screen and select “Select Chord” from the list.
It allows you to select chords and save a chord progression on each tab from A to E while listening a song on your iPod.
You can toggle the chord selection between 2 tabs shown in the right side of the screen.
- CHORD Tab
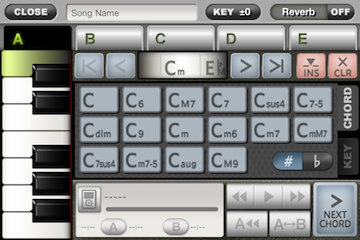
This mode allows you to select a chord from major chords.
Select a root note on the left side of the keyboard, then tap a chord shown on the right in order to select the chord.
- KEY Tab
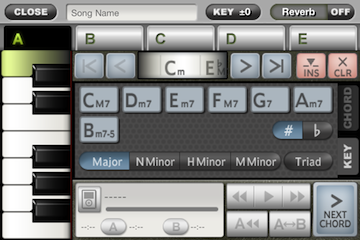
This mode allows you to select chords that will correspond to the song keys.
Select a root note on the left side of the keyboard, then select a type from Major, Natural Minor, Harmonic Minor or Melodic Minor amongst the buttons shown on the right. The chord corresponding to your selection will be displayed.
e.g.: If you select C on the keyboard then select a key type “Major”, a chord that satisfies C major scale will be displayed.
A chord will be shown in a four-note chord, although, you can change to three-note chord by tapping “Triad”.
In order to specify the place where you setup a chord, use the arrows on both sides of the upper screen where the selected chord is displayed.
The CLR button deletes the chord shown in the middle of the screen. The INS button inserts a space between chords in order to allow you to setup a new chord.
You can control the iPod Library at the bottom of the screen.
Tap the iPod icon to select a song from your Library.
Tap the Play button once to play a song. Tapping the button again stops playing.
The Forward/Rewind button fast-forwards or rewinds while you hold the button.
The A/B button remembers the playback position so that you can go back to the A position or repeat between the A and B positions.
The NEXT CHORD button on the right bottom of the screen works the same as the right arrow which is shown on the right side of the chord.
The button is positioned for smooth operation after you setup a chord.
You can detect the notes of a song playing in your iPod, and you can also try playing with one of your own musical scores.
– Settings –
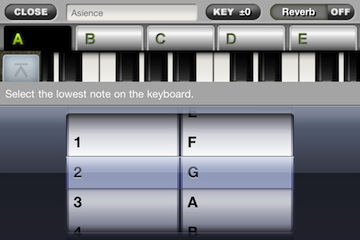
Specify the lowest note you use on the keyboard from the Setting menu.
******* Melody Play *******
This mode allows you to play on upper and lower keyboards.
You can select how to specify the keyboard position on the Settings menu.
- Sequence Setting
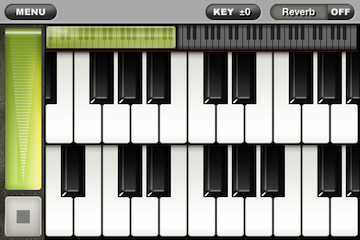
You can specify continuous octaves throughout the upper and lower keyboards. The higher notes play on the upper keyboard while the lower notes play on the lower keyboard.
- Division Setting
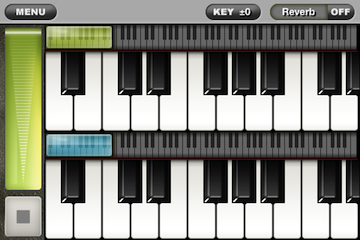
It specifies the position of each keyboard. You can specify the detached key position.
******* Common *******
– Change sound –
To change sound, tap the menu button on the upper left of the screen and select “Change Sound” from the list.
You can activate or deactivate (ON/OFF) the selected effect by using the button in the top right of each play mode screen.
- Piano Sounds
Grand Piano / Upright Piano / Electric Piano / Ray’s Piano
- Sound Effects
Reverb / Lowpass / Highpass / Chorus / Flanger / Distortion / Tremolo / AutoPan / AutoWah
– KEY button at the top of the screen –
Pressing the button shows you a slider which flattens or sharpens the notes.
Use this function when you can’t tune a key while playing and singing a song, or when you wish to sharpen or flatten notes without changing the chords on the screen. (Adjustable from -6 to +6)
******* Overall settings *******
– Adjust the entire volume –
When playing along with the iPod, you may find out the sound is low.
You can turn up the volume. However it may cause the clipping noise.
最近のコメント